Yes, you can take a compliant U.S. passport photo at home, but the image has to meet the State Department’s exact specifications and stay completely unedited. That means correct size, correct head measurements, a true white or off-white background, even lighting with no shadows, and zero digital retouching. Get any one of those wrong and you risk an automatic hold on your application, so the official State Department photo guidance and a tool like the State Department photo checker matter more than any camera app you might download.
TL;DR:
- Photos must be taken within the last six months and precisely measure 2×2 inches with a head height of 1 to 1 3/8 inches.
- The background should be plain white or off-white with no shadows, patterns, or objects, and lighting must be soft daylight facing the subject.
- Use the rear camera without filters, HDR, or smoothing features, and shoot in vertical orientation with enough headroom for proper cropping.
- Digital images must be in JPEG format, between 600×600 and 1,200×1,200 pixels, and checked with the official State Department photo tool before upload.
- For urgent travel within two to four weeks, professional services or courier options can reduce the risk of rejection due to photo issues.
Table of Contents
- Passport Photo at Home: The Official Size and Quality Rules
- What’s the Best Home Setup for Lighting and Background?
- How Do You Take the Actual Photo Step by Step?
- Cropping, File Prep, and Uploading Without Breaking the Rules
- Why Do Passport Photos Get Rejected, and How Do You Fix It Fast?
- How Do You Photograph a Baby or Toddler for a Passport?
- Should You Trust an App, or Stick With the Official Tool?
- Is DIY Enough, or Should You Get Help?
- When a Photo Problem Becomes a Timeline Problem
- Sources
- FAQ
Passport Photo at Home: The Official Size and Quality Rules
Before you touch a camera, know the numbers you’re shooting for. The State Department requires a printed photo that measures exactly 2×2 inches (51×51 millimeters), with your head, from chin to crown, taking up 1 to 1 3/8 inches (25 to 35 millimeters) of that frame. The photo also has to be taken within the past six months, so an old vacation headshot won’t cut it even if it technically fits the dimensions.
The background rule is where a lot of home attempts fail. It needs to be plain white or off-white, with no visible shadows, patterns, furniture, or pets sneaking into frame. The photo must be in color, high resolution, and completely free of filters, background replacement, or any software-based smoothing.
Passport Photo at Home Requirements
| Requirement | Specification |
|---|---|
| Printed size | 2×2 in (51×51 mm) |
| Head height | 1 to 1 3/8 in (25 to 35 mm) |
| Photo age | Taken within the last 6 months |
| Background | Plain white or off-white, no shadows |
| Color | Full color, no filters or edits |
If you’re submitting online, the file needs to follow a separate set of digital specs. The State Department’s upload guidance calls for JPEG format in the sRGB color space, with pixel dimensions roughly between 600×600 and 1,200×1,200, and a file size generally under 10 MB.
Quick Reference: What Trips Up Most DIY Photos
- Head size measured wrong because the subject stood too close or too far from the camera
- Background isn’t a true white, often picking up a beige or gray cast from indoor lighting
- Photo is older than six months, even if the person’s appearance hasn’t changed
- File exceeds the pixel or size limits when uploading through an online application
Unacceptable photos remain the single most common reason applications get placed on hold, which is worth remembering before you assume any clear, well-lit selfie will pass.
What’s the Best Home Setup for Lighting and Background?
Physical setup determines almost everything about whether your photo passes. No editing app can fix a shadow that’s baked into the original shot, so getting the room right matters more than any camera trick.
Start with distance. Stand about half a meter away from your background wall. That gap keeps your shadow from falling directly behind you, which is one of the most common reasons a background gets flagged as non-compliant. Position the camera itself about 4 to 5 feet away at eye level. That distance keeps facial proportions natural and avoids the slight distortion that comes from shooting too close with a wide lens.
Lighting should come from soft, indirect daylight facing you, ideally from a window during midday. Avoid direct sunlight, which creates harsh shadows under the brow and nose, and skip flash entirely since it tends to blow out skin tone and create a glare spot. If one side of your face looks darker than the other, bounce some light back using a white poster board or even a plain sheet held just out of frame.
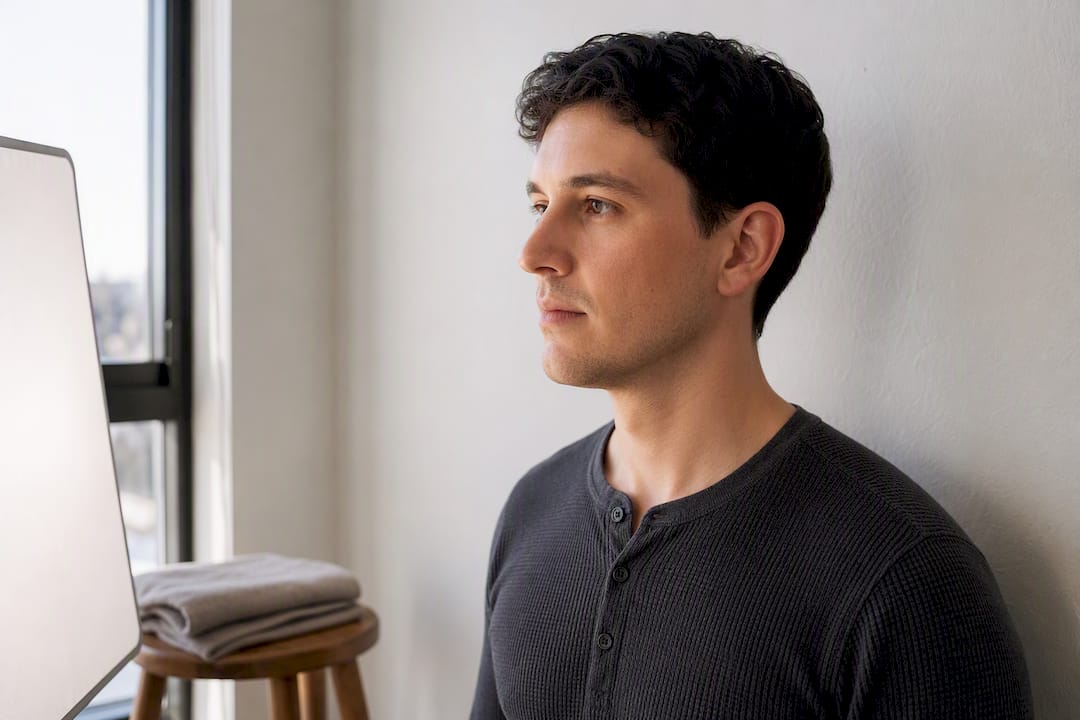
For the background itself, a blank white wall works if you have one, but a taut white sheet or a large piece of white poster board pinned flat also does the job. Check the frame carefully for light switches, picture hooks, or wall texture that might show up once the photo is cropped tight.
Clothing should contrast with the background, so avoid white or very pale shirts that blend into the wall. Hair should be pulled back enough that your full face, from hairline to chin, stays visible.
- Stand about half a meter from the background wall to avoid shadow lines
- Keep the camera 4 to 5 feet away at eye level
- Use daylight from a window, not flash or overhead bulbs
- Choose a plain white wall, sheet, or poster board with nothing else visible
Pro Tip: If your only white wall has a shadow problem no matter where you stand, tape a white poster board to a door and shoot against that instead. It’s flat, portable, and immune to room lighting quirks.
How Do You Take the Actual Photo Step by Step?
Once the room is set up, the shooting process comes down to a handful of deliberate steps rather than trial and error.
- Set your phone to the rear camera. It captures higher resolution and less distortion than the front-facing selfie lens.
- Turn off portrait mode, HDR, beauty filters, and any automatic smoothing. These features can count as digital edits and are a common cause of passport photo rejections.
- Mount the camera on a tripod, a stack of books, or hand it to an assistant standing 4 to 5 feet away at your eye level.
- Turn on the grid lines in your camera settings to help keep the shot level and centered.
- Set a 3 to 10 second timer if shooting alone, or have your assistant count down so your expression stays natural.
- Take several frames in a row, shifting your position slightly between each one to give yourself options.
- Shoot in vertical orientation and leave extra space around your head and shoulders. It’s easier to crop in tighter later than to discover you don’t have enough room.
Keep your expression neutral, with both eyes open and your mouth closed. Glasses should come off entirely, since reflections and frame shadows are a frequent cause of rejection. Religious head coverings are allowed as long as your full face remains visible from chin to forehead. If you use a wheelchair, you can be photographed while seated as long as the background behind you is still plain and unobstructed.
Pro Tip: Take at least ten frames. Passport photo attempts almost never fail because of a bad face. They fail because of a shadow, a stray hair, or a slightly tilted head that nobody noticed until it was cropped and printed.
Cropping, File Prep, and Uploading Without Breaking the Rules
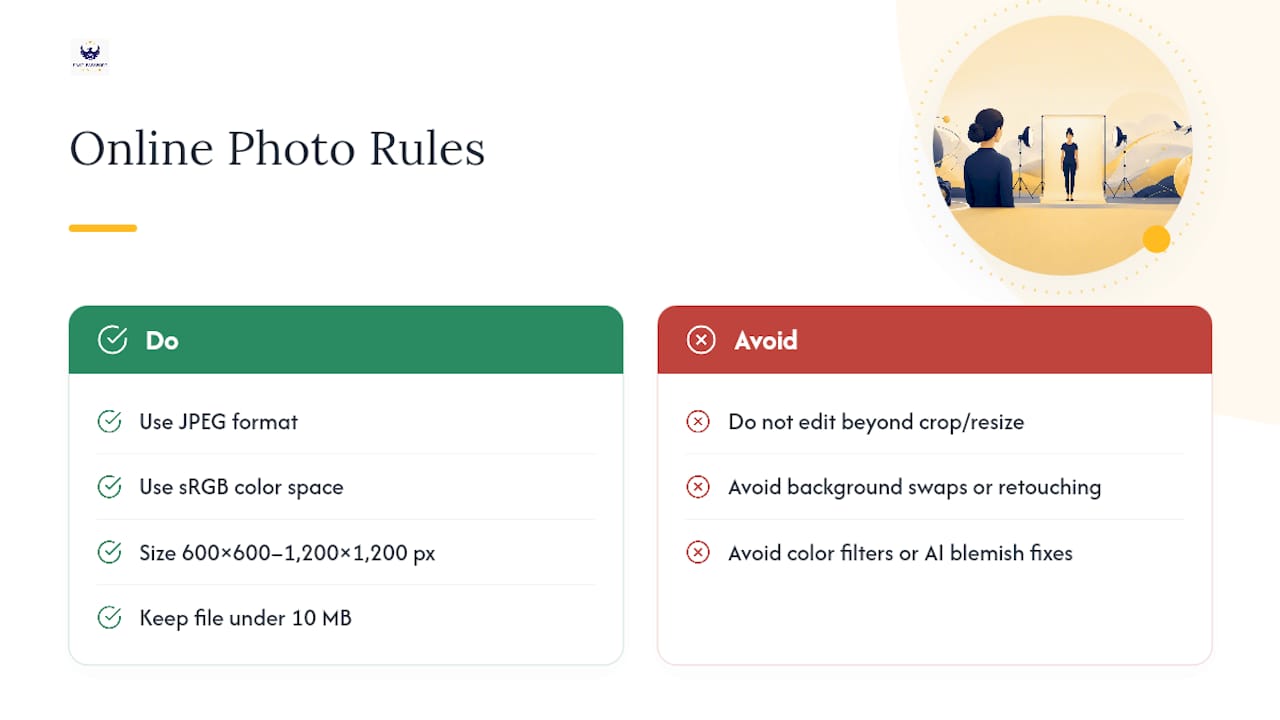
The only digital actions allowed on a passport photo are cropping and resizing. Anything beyond that, background swaps, blemish removal, AI retouching, or color filters, violates the rules and can flag your application for review.
When you crop, use a plain resizing tool rather than an editing app, and line the image up so your head fills the required 1 to 1 3/8 inch range within the final 2×2 inch frame. Your eyes should land within the vertical placement window the State Department specifies, roughly two-thirds up from the bottom of the frame.
For online applications, stick to JPEG format, sRGB color, and a pixel size in the 600×600 to 1,200×1,200 range, keeping the file under 10 MB. Before you submit anything, run the image through the official State Department photo tool, which checks sizing and flags obvious compliance issues.
If you’re mailing a paper application instead, print on genuine photo paper at a minimum of 300 DPI. A photo printed on regular printer paper, even at high resolution on screen, usually looks flat and gray once it’s physically printed.
Why Do Passport Photos Get Rejected, and How Do You Fix It Fast?
Most rejected photos fail for one of a handful of predictable reasons, and nearly all of them are fixable with a quick reshoot rather than a full do-over of your process.
- Visible shadows on the face or background: Move farther from the wall and add a bounce light to fill in dark spots.
- Head size outside the 1 to 1 3/8 inch range: Adjust your distance from the camera and reshoot rather than trying to crop your way out of it.
- Filters, smoothing, or background replacement detected: Disable every automatic enhancement and reshoot with the rear camera in plain mode.
- Glare or reflections from glasses: Remove glasses entirely before shooting.
- Textured or off-white background: Swap in a plain white sheet or poster board.
- Low resolution or blurry image: Reshoot at your phone’s highest resolution setting and hold the camera steady, or use a tripod.
Fast Passport Center’s guide to common passport rejection reasons breaks down several of these issues in more detail if you want to see real examples before you shoot.
If you’ve reshot two or three times and keep hitting the same wall, or your travel date is inside the next few weeks, that’s the point to stop troubleshooting alone and get a second set of eyes on the image.
How Do You Photograph a Baby or Toddler for a Passport?
Infant and toddler passport photos follow the same rules as adult ones, but getting a cooperative subject takes a different approach.
- Lay the baby on a plain white sheet or blanket and photograph from directly above, with the sheet filling the entire frame behind them.
- If the baby can sit or be propped up, have an assistant hold them from behind or below, staying completely out of the frame, then crop tightly so no hand, arm, or fabric from the helper appears in the final image.
- Aim for open eyes and a neutral or naturally relaxed expression. The State Department allows more flexibility for infants who can’t hold a completely blank expression on command.
- Check the final crop carefully to confirm no toys, hands, or bottle props are visible anywhere in the frame.
If your child doesn’t stay still, won’t stop grabbing at the camera, or you’re on a tight deadline and can’t afford a wasted afternoon of reshoots, a professional photo counter or a rush child passport service can guarantee a compliant image on the first try.
Should You Trust an App, or Stick With the Official Tool?
The State Department’s own photo tool is the only checker that actually matters, since it applies the same standards a reviewer will use once your application lands on their desk. It checks sizing, cropping, and basic compliance issues before you ever submit.
Plenty of third-party phone apps promise a perfect passport photo in one tap, but many of them auto-enhance skin, swap in a fake white background, or apply sharpening filters by default. Those edits are exactly what the rules prohibit, and they’re often invisible to the person using the app.
- Use the State Department tool as your final compliance check, not a first-pass editor
- Use a plain resizing app only for cropping to the correct dimensions
- Avoid any app that advertises “auto background removal” or “AI photo enhance” as a feature
- Never submit a photo you haven’t personally checked against the official size and background rules
The safest order of operations: capture the image correctly in the first place, crop it with a basic resizing tool, then confirm compliance with the official checker before you upload or print anything.
Is DIY Enough, or Should You Get Help?
Taking your own passport photo makes sense for most people who have a few days to get the setup right and aren’t racing a deadline. If you can control your lighting, get a genuinely white background, and take your time with a tripod, there’s no reason to pay for something you can do correctly at home.
That calculation changes once your travel date sits inside two to four weeks, you’ve already had a photo rejected once, or you live hours from the nearest regional agency. In those situations, a courier or expediting service reduces the risk that a photo issue turns into a missed flight. Fast Passport Center has spent more than 20 years working directly with the State Department’s courier network, which is exactly the kind of backup worth having when the clock is the real problem, not your camera skills.
— Andy Irons
When a Photo Problem Becomes a Timeline Problem
A rejected photo costs you more than a reshoot, underscoring why travelers opt for verified services to avoid visa and document rejection scenarios. It costs you the days your application sits on hold while a reviewer flags it and sends it back, and if your trip is close, those days matter more than anything else. Fast Passport Center exists for exactly that gap: a State Department registered courier with drop-off offices in 24 cities, built specifically for travelers who don’t have time to gamble on a DIY photo or a slow post office line.
If your travel date is within the next three days or you’re dealing with a genuine emergency, an in-person visit to a regional passport agency is still your fastest path. But if you’ve got two days to four weeks before you fly, and especially if you live in a city like Tampa, Charlotte, Sacramento, Nashville, or Louisville where the nearest agency is hours away, a courier service closes that gap without the drive. For travel four or more weeks out, a standard USPS post office visit is still the most practical route. Fast Passport Center’s team reviews your documents and photo before anything gets hand delivered to a passport agency, catching the kind of mistake that would otherwise send your application back to square one. Start with the passport expediting service page to see how fast your specific timeline can move.
Sources
FAQ
Can I take my U.S. passport photo at home?
Yes, as long as it meets every State Department specification exactly, including size, background, lighting, and recency, and the image contains no digital edits or filters of any kind.
What’s the easiest way to take a passport photo at home?
Stand 20 inches from a plain white wall, use soft daylight from a window, shoot with your rear camera on a tripod from 4 to 5 feet away, and disable every automatic filter or beauty mode before you press the shutter.
How can I get a 2×2 passport photo at home?
Shoot with extra headroom, then crop the image with a basic resizing tool so your head measures between 1 and 1 3/8 inches within a final 2×2 inch frame, and confirm the result with the official State Department photo tool before submitting.
Is it okay to take passport photos at home?
It’s fully accepted by the State Department as long as the photo meets every listed requirement, since the rules govern the final image, not who took it or where it was shot.
When should I skip DIY and get professional help instead?
If your travel date falls within two to four weeks, you’ve already had a photo rejected, or you live far from a regional agency, a courier or expediting service removes the risk of a photo problem turning into a missed trip.